| Below we have the arrangement of the element: | ||||
 |
||||
The element (Joppa element number #E120-06.25-205 at 750 Watts) is shown entering the kiln cavity in the rear through two lead tubes. The element proceeds through the kiln space in a "U" shape supported on 1/4" mulite rods that are 15" long. Each mulite rod is supported with two donuts, and those donuts are held in place by a wire that is wrapped around the groove in the middle of the donut. This support wire is pulled through the insulation using a donut needle and attached to the outside of the kiln in much the same way as the frax pigtails are attached. |
||||
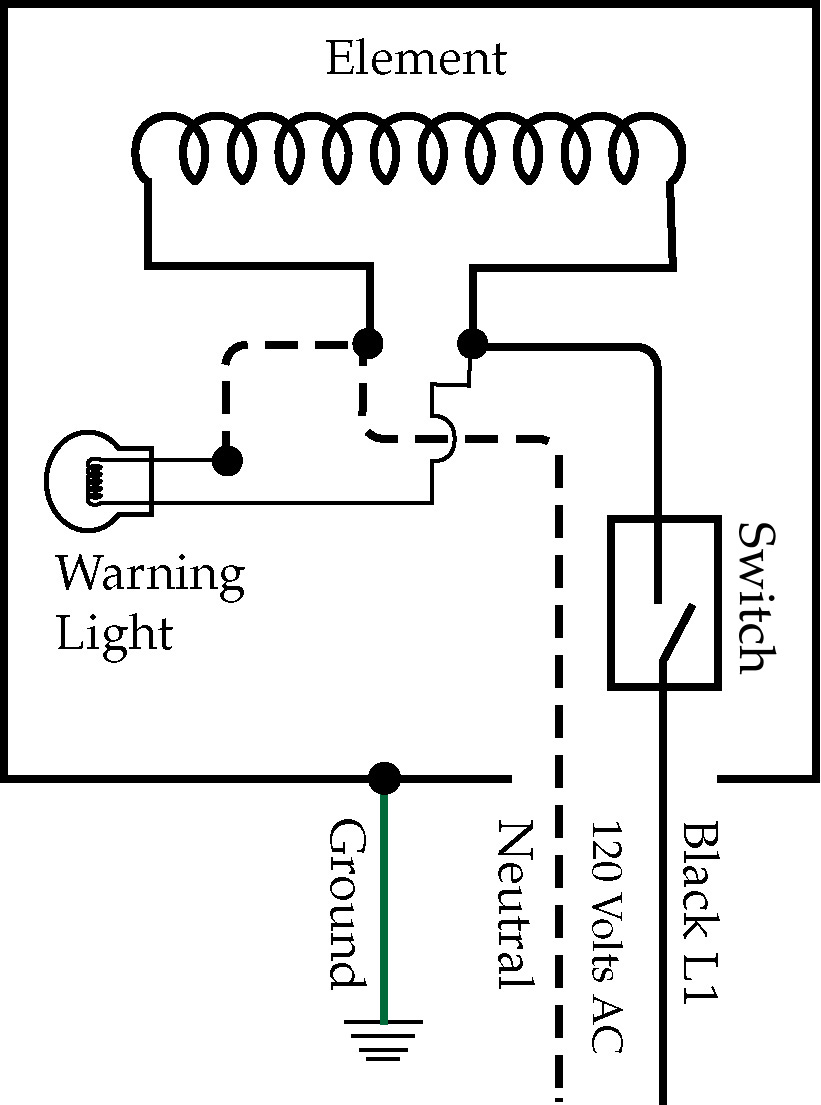
Next, is the switch end of the kiln. Here is a general overview shot of the project. The image shows an infinite switch, but you could substitute a toggle switch. I would recommend having some kind of "kill switch" just in case something goes wrong. |
||||
 |
||||
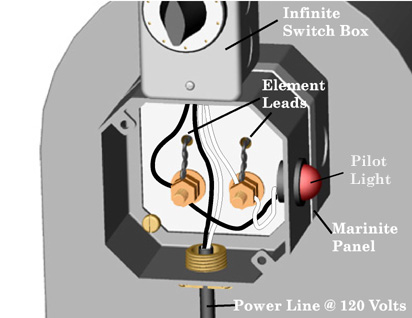
Below is a view of the wiring in the 4" box, with the cover removed. For a more detailed view of this component study figure 19-8 on page 96 of A Glassblower's Companion. Figure 19-8 is an in-depth schematic of the situation here at hand. Also look at marinite connection boards. |
||||
 |
||||
|
||||